A user filter is a tool that lets you organize users on the Grispi platform by grouping them according to specific criteria. These filters make it easier to manage and analyze users because you can list them based on defined conditions.
In Which Situations Is It Used?
User filters can be applied in various scenarios. Some example use-cases include:
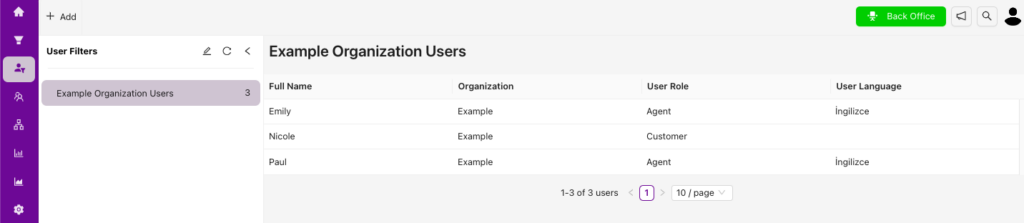
- Organization-Based Filtering: When you want to see all users who work in a particular organization.
- Role- or Authorization-Based Filtering: When you need to filter users with a specific role or authorization (e.g., manager, agent, customer)
- Filtering Based on Custom User Fields: Grispi filters are not limited to standard user information; you can filter more precisely by adding custom user fields. Custom user fields allow you to store detailed information about users and filter based on that data.
See the article on creating custom user fields here.
Example custom user fields might include a user’s province, title, department, or education level. In user filters, you can filter according to any custom user fields you have added.
How to Create a User Filter?
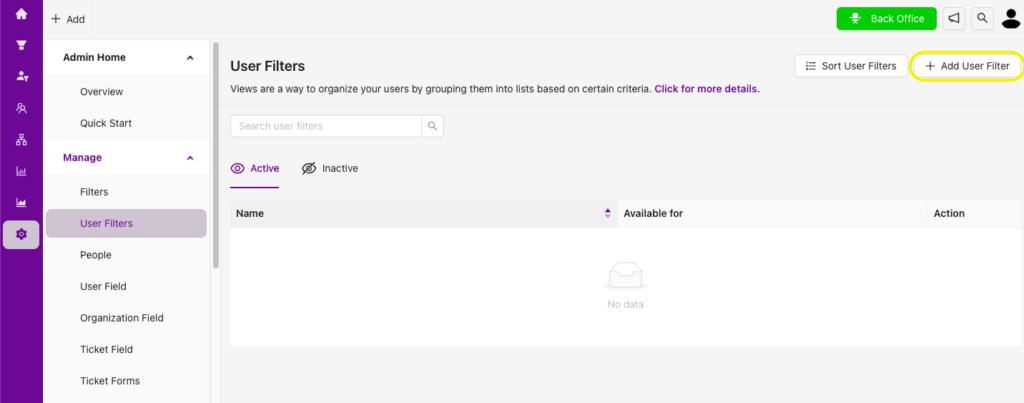
- From the Grispi main menu, go to “Settings.”
- Click “User Filters” under “Manage” in the left-side menu.
- Click the “Add User Filter” button in the upper-right corner.
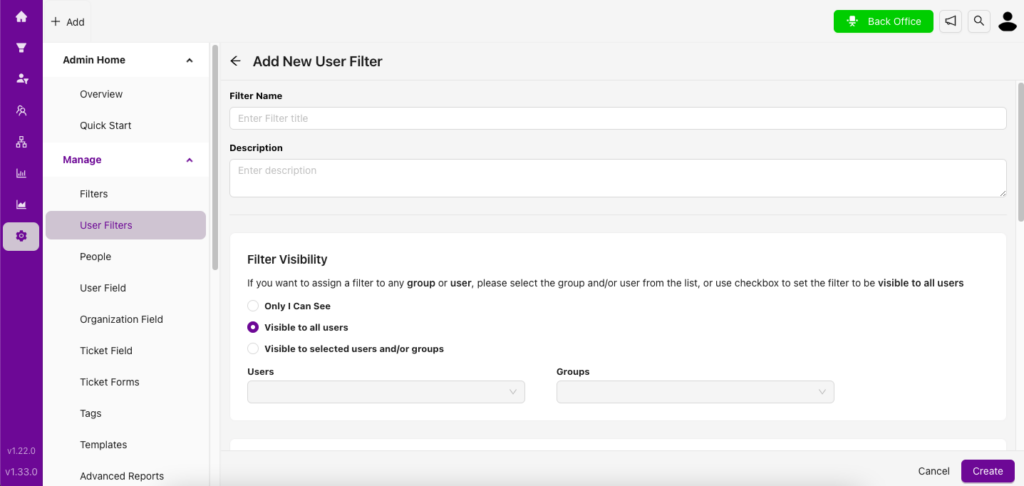
- Enter a name and description for the filter. These help you identify the filter and let other users understand its purpose.
- Define Filter Visibility to specify who can see this filter. You can make the filter visible to all users, only to yourself, or to specific users or groups.
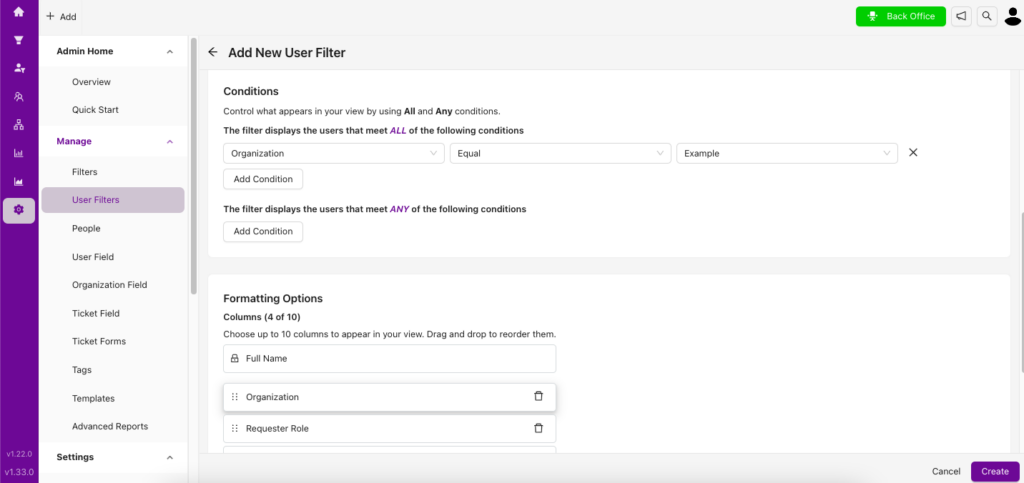
- Select the conditions under which the filter will work. These conditions determine which users are included—for example, users who work in a specific organization.
- In Formatting Options, choose which fields will appear when listing the filter. Click “Add Column” to include the fields you want to display.
- When exporting the filter, only the fields selected in the listing options are exported. You can add up to 10 listing fields.
- Under Order By, choose how you want to sort users in the filter.
- After entering all the information, click “Create” to save the filter.
By following these steps, you can create user filters on Grispi and streamline your management and analysis processes by grouping users according to specific criteria.