Triggers are business rules that automatically perform actions when specified conditions are met after a ticket is created or updated. For example, when a user creates a new claim or when a specific date arrives, triggers detect these events and automatically perform predefined actions.
Administrators can create automations by following the steps below.
To add a trigger;
- Go to the Settings page and select the Triggers submenu from the Business Rules menu on the left.
- Click on the Add Trigger button.

- Enter a title for the trigger.
- Add conditions and actions for the trigger.
A trigger consists of two parts:
- Conditions that must be met for the trigger to work
- Actions to be taken when conditions are met
1. Conditions;
Click the Add Condition button. Define the conditions under which you want the action to take place when an event occurs.
If you want more than one condition to be met at the same time, add your conditions in the “Meet all of the following conditions” field.
If you want the trigger to run when any of multiple conditions is met, add your conditions in the “Meet any of the following conditions” field.
2. Action;
Click the Add Action button. Select the actions that will take place if the general conditions are met.
You can update the priority, assignment, type, or other form fields, or send emails for tickets that meet the conditions.
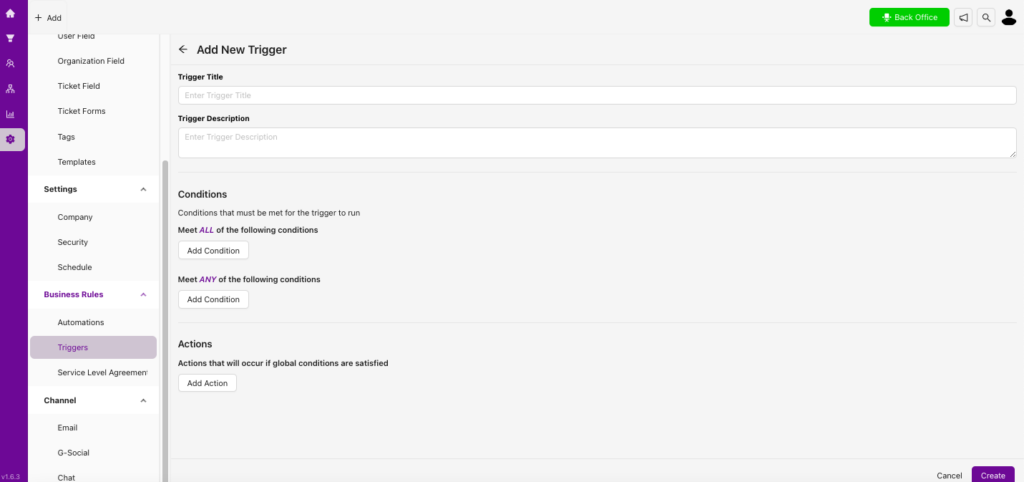
- Save it by clicking “Create.”