This article will help you connect JivoChat to Grispi. This integration allows you to create tickets directly from chat logs and offline messages in JivoChat, configure the priority and category of tickets, and search for customers’ past conversations and information using contact emails.
- Open the JivoChat desktop application or the web version at app.jivosite.com and log in with your admin credentials.
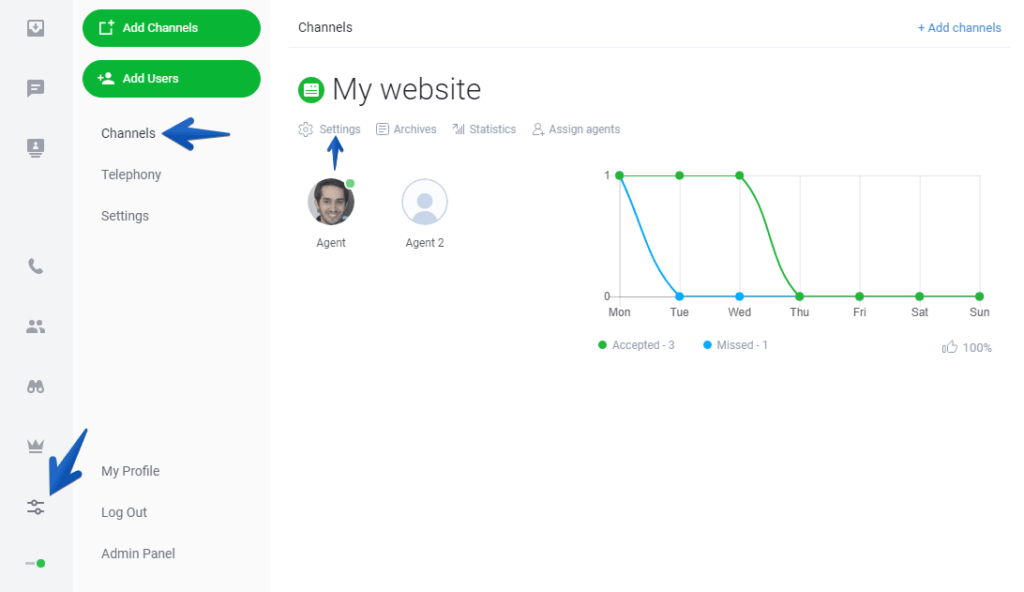
- Click on the Manage button in the lower-left corner, then go to Channels → Settings (under your website name).
3. Next, move to the Notifications menu. Fill in your Grispi email (e.g., [email protected]) in the fields Email for chat logs and notifications and Email for offline messages.
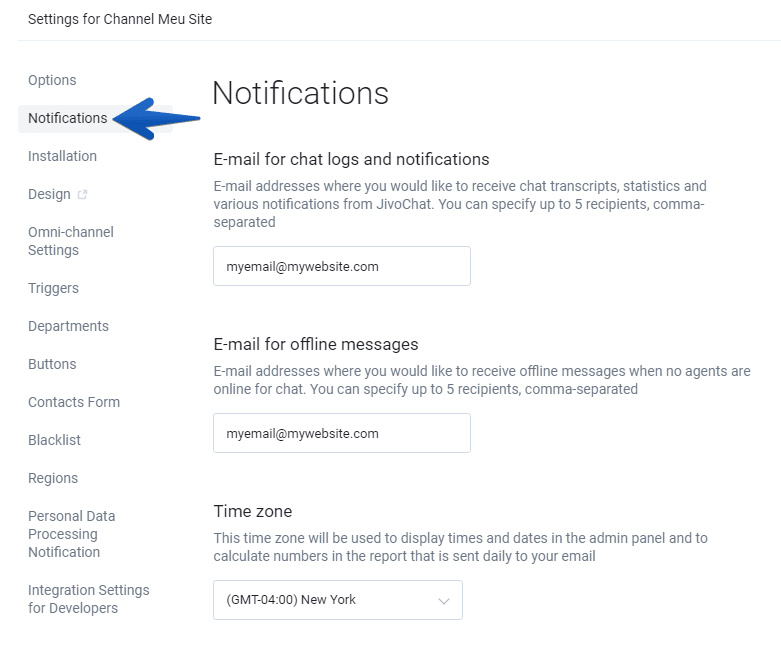
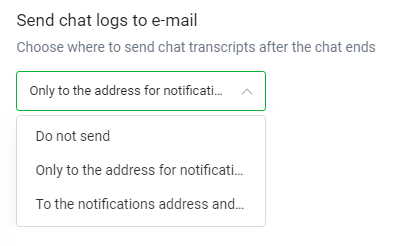
4. Check if the option to send chats by email is enabled in the Notifications settings. By default, this option is disabled for all new accounts and must be enabled manually.
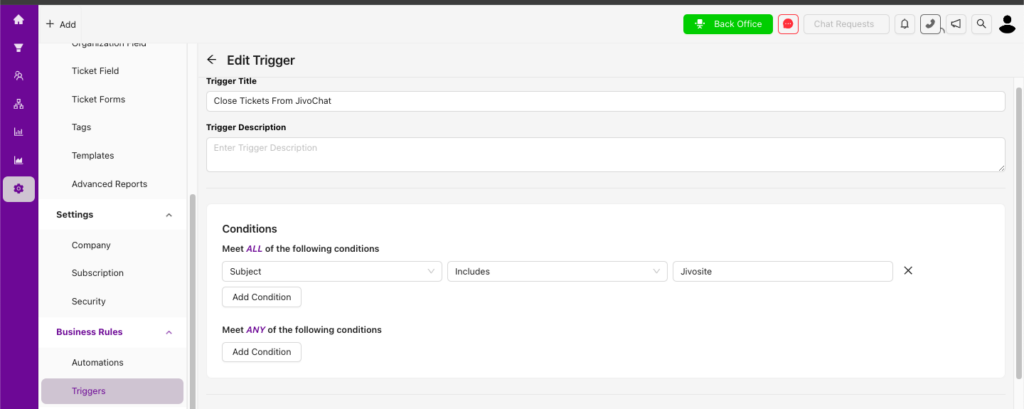
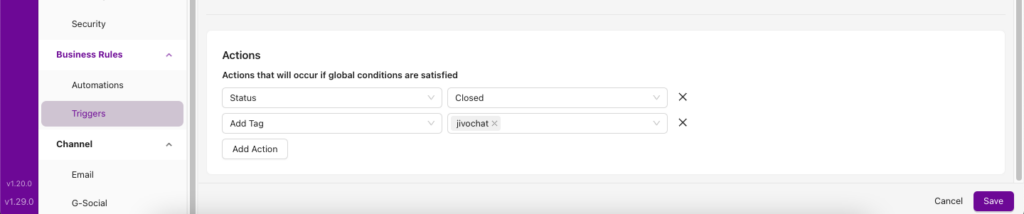
5. You need to create a trigger in Grispi. Go to your Grispi account and click on the Settings button. In the Business Rules section, select Triggers and create a new trigger with the following conditions:
-This trigger will add the “jivochat” tag to tickets from JivoChat and remove it when the conversation ends.
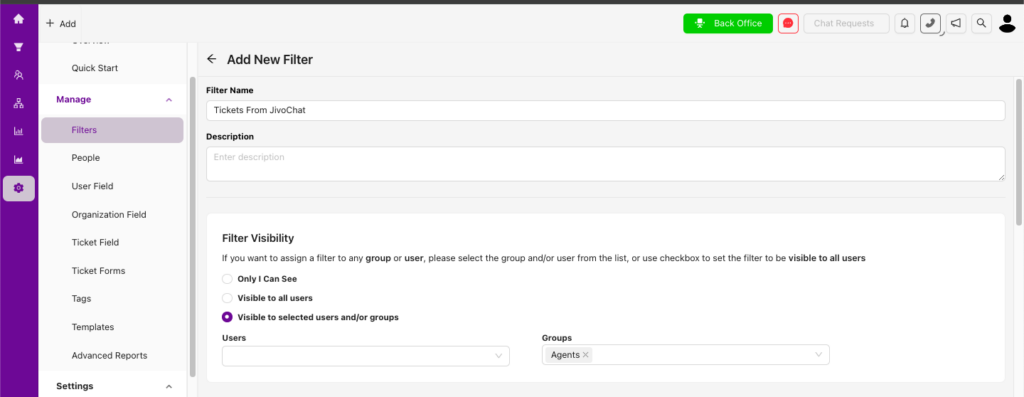
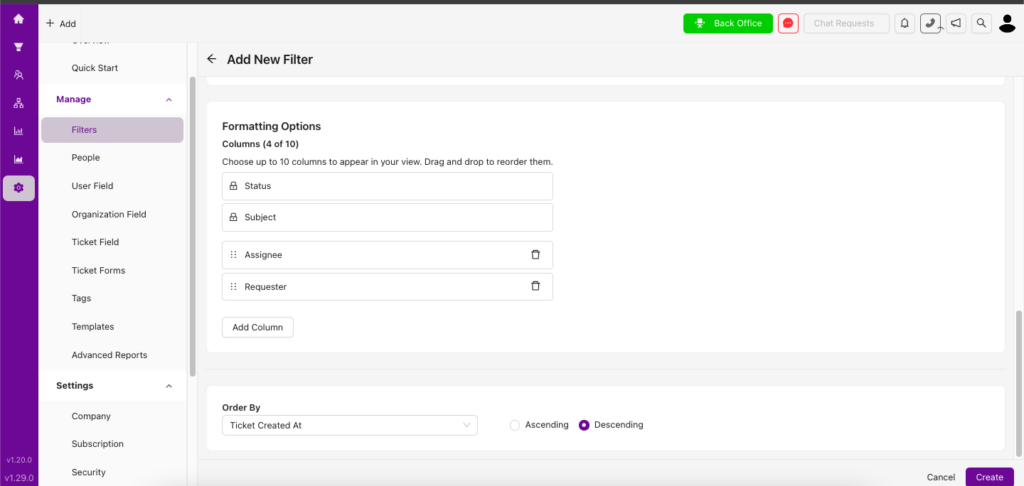
6. Thanks to the trigger we created, you can now create a new filter to list incoming JivoChat tickets.
To do this, click on the Settings button. In the Administrative Rules section, select Filters and create a new filter with the following conditions. You can choose which users or groups will see this filter.
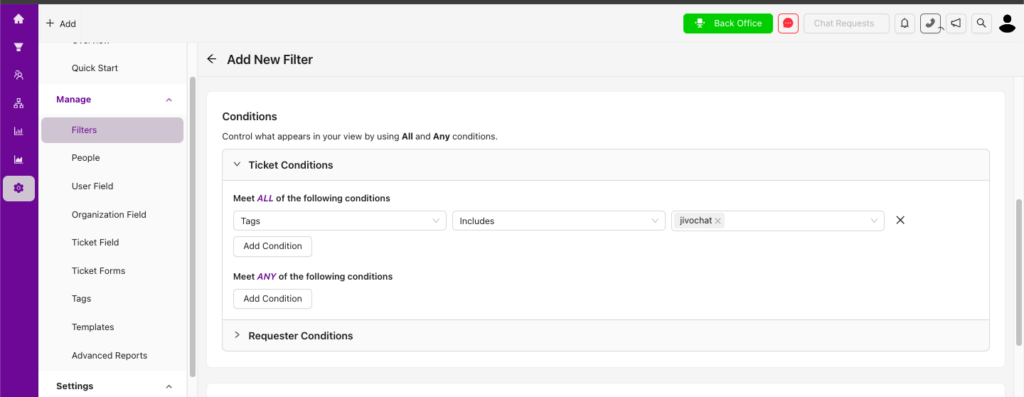
In this filter, you can view tickets from JivoChat. You can also view customers from JivoChat along with their past conversations.