After creating your new account, you can follow this guide to quickly set up and start using Grispi. In this guide
- User management
- Request forms and filter settings
- Automations
- Email, social media, WhatsApp and call center integrations
You can find step-by-step basic configurations such as
✉️ 1. Mail Integration
✅ What does it do?
It ensures that customer emails to you are automatically dropped as tickets in Grispi.
🔗 Other E-Mail Services (Outlook, Exchange, Yandex)
If you are using systems other than Gmail, you can complete the forwarding process with the guide below:
👉 Guide to Forwarding Email to Grispi
📧 For additional support → [email protected]
You can find the article How to Integrate Email in Grispi (Mail Forwarding) here.
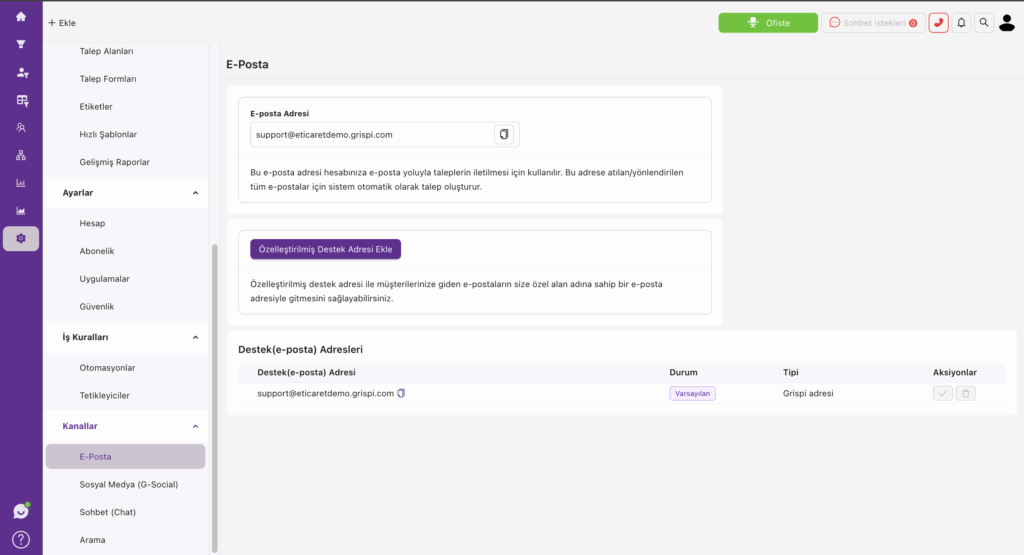
📩 Your unique forwarding address:
[email protected]
All mails forwarded to this address are converted into requests.
☁️ Gmail / Google Workspace Forwarding
🔧 Installation Steps:
- Log in to your Gmail account
- At the top right, switch to Settings (⚙️) > See All Settings
- Click on the Forwarding and POP/IMAP tab
- Press the “Add forwarding address” button
- [email protected] Enter the address
- The verification email sent by Gmail appears as a request in Grispi
- Paste the verification code from the email on the Gmail screen
- Activate and save the redirect
✅ Now all incoming emails from Gmail land in Grispi.
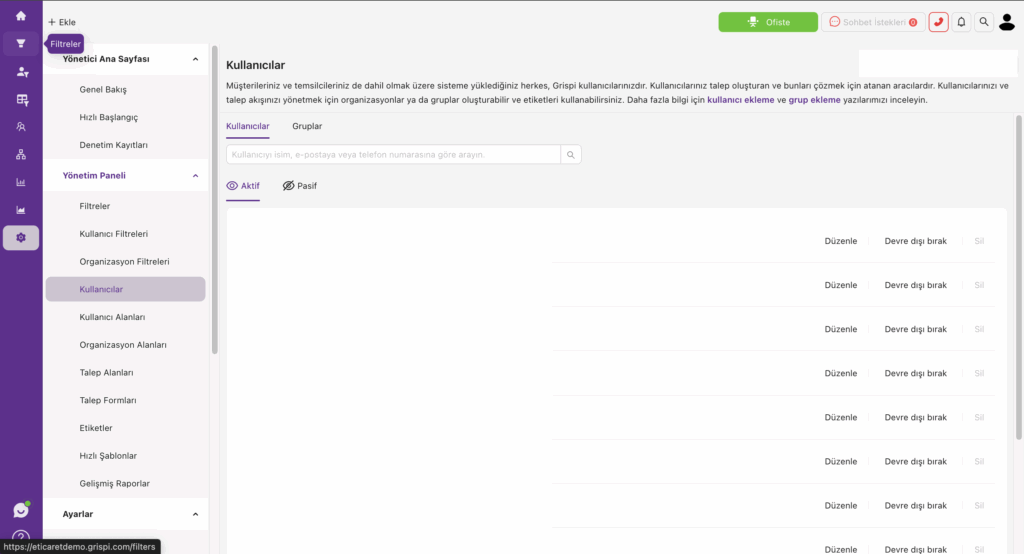
🔐 2. Add User
✅ What does it do?
Allows you to define team members who will manage, respond to or handle tickets in Grispi.
🛠️ How is it done?
- Go to Settings > Users
- Click on the “Add User” button
- Enter first name, last name, email and role information
- An invitation is sent to the user, they can log in via e-mail
How do I add a user? article is available here.
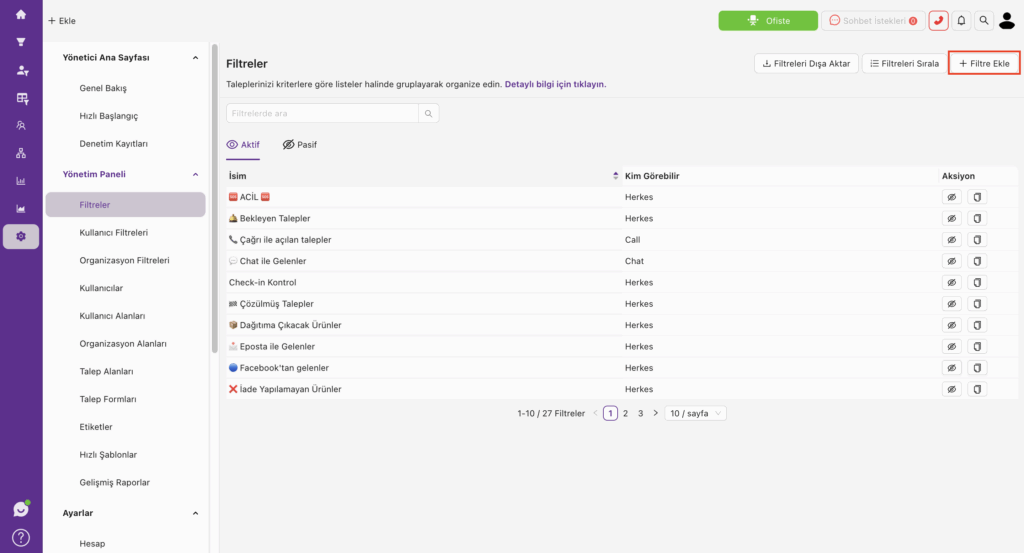
🗂️ 3. Filter Creation
✅ What does it do?
It categorizes incoming requests according to certain rules, ensuring that agents only see requests that are relevant to them.
🛠️ How is it done?
- Requests > Filters > Create Filter
- Specify the name of the filter (e.g. “Instagram Requests”)
- Define conditions:
- Channel = Instagram
- Status ≠ Closed
- Save the filter
How can I create a filter? article is available here.
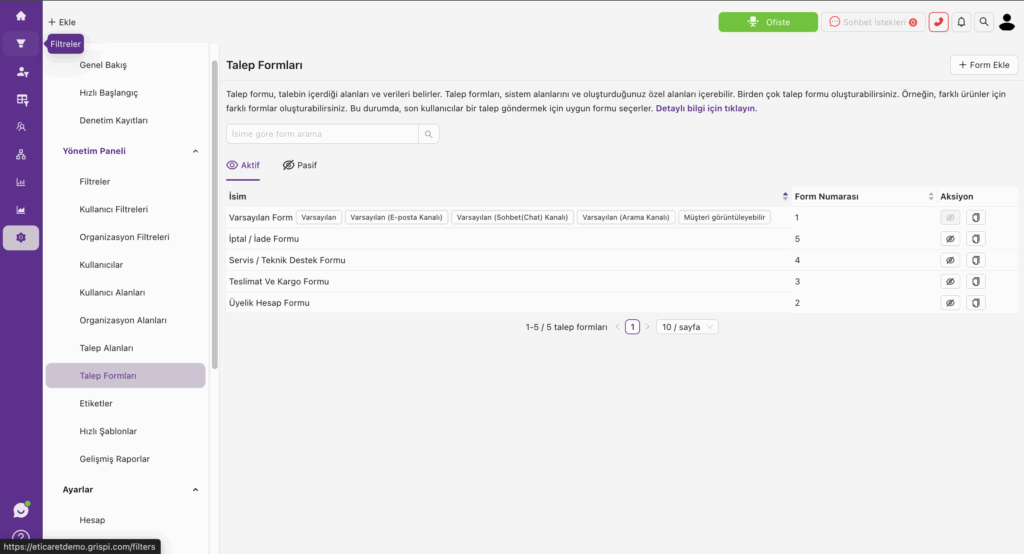
🧾 4. Request Forms and Fields
✅ What does it do?
You determine what information is collected when receiving requests from customers. This ensures correct routing and fast resolution.
🛠️ How is it done?
- Go to Settings > Request Forms
- Create a new form or edit an existing form
- Specify fields: Description, Order Number, File Upload, etc.
- Define the mandatory/hidden status of fields
You can find the article Creating a Customer Request Form here.
⚙️ 5. Triggers
✅ What does it do?
Triggers allow you to take automated action when a certain event occurs in Grispi. This way, the system can react in real time and requests can be automatically classified, routed or notified.
🛠️ How is it done?
- Go to Settings > Automation > Triggers
- Click on the “Add Trigger” button
- Define conditions (ex: Channel = Instagram, Status = On)
- Identify actions (e.g.: Add tags: social media)
- Save and activate
🎯 Example use:
- Automatically adding a “social media” tag to every new request from Instagram
- Automatically directing requests from WhatsApp to a specific queue
- Marking requests received on holidays with a special routing label
How do I create a trigger? article is available here.
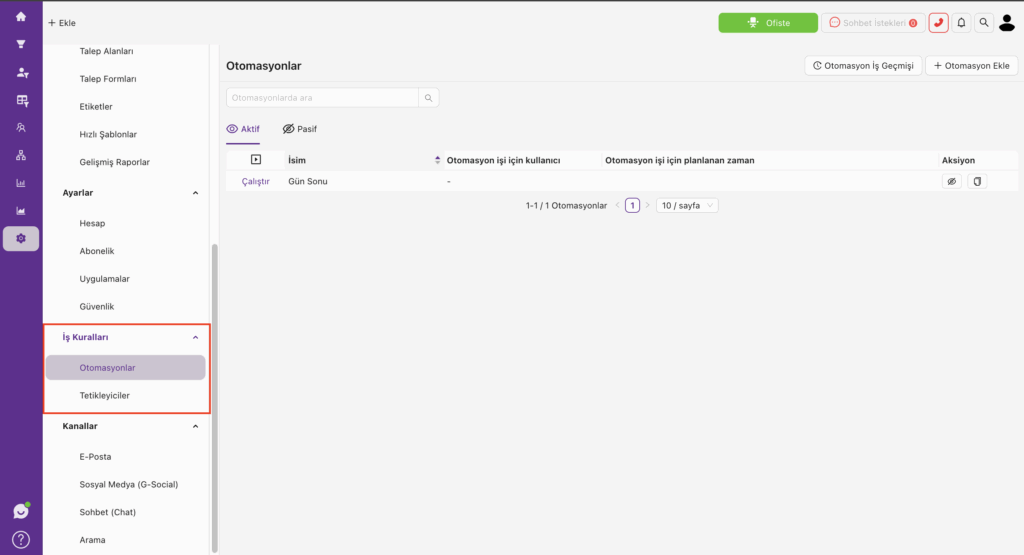
🔁 6. Automations
✅ What does it do?
Automations are rules that run manually or at certain time intervals according to the conditions you define in Grispi. Thus, processes that need to be constantly controlled are automated.
🛠️ How is it done?
- Go to Settings > Business Rules > Automations
- Click on the “Add Automation” button
- Set conditions (ex: Request creation date > 5 days ago, Status = Open)
- Select actions (e.g.: Change status: In follow-up)
- Register and activate automation
How can I create automation? article is available here.
🎯 Example use:
- 48 hours of unanswered requests to be reported to managers
- Requests that have been open for 5 days to “in follow-up” status
- Automatic closure after 3 days of requests with no customer response after reply
Thanks to this structure, by using Grispi’s automation capabilities, you can both react quickly to instant events and reduce the workload that accumulates over time with automated rules.
🛠️ How is it done?
- Settings > Business Rules >Trigger > Add Trigger
- Example of a condition: Channel = WhatsApp
- Action example: Add tag, queue, send email
- Save and activate
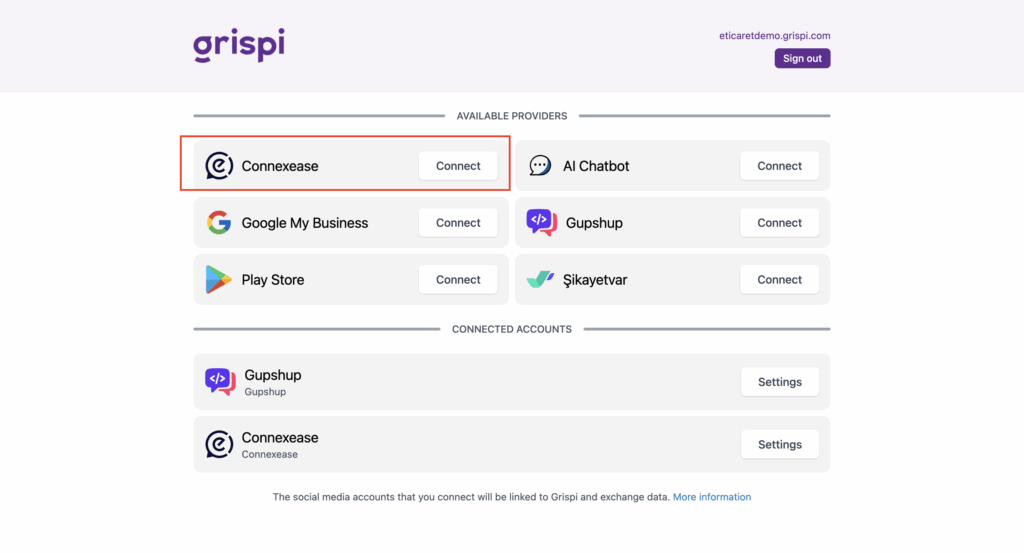
📣 7. Social Media Integration
✅ What does it do?
It allows Instagram and Facebook messages to be managed through Grispi.
📌 Necessary Steps:
- Contact Grispi technical team for Connexease integration
- Organize a meeting with someone who is an administrator on a Facebook Business Manager account
- Log in to Grispi after the meeting:
- Settings > Channels > Social Media G-Social
- Go to the Connexease domain
- Enter the username and password you received
- After the integration is complete, create a filter:
- Example: Channel = Instagram
Grispi Integration with ConnexEase: Social Media and WhatsApp Management article is available here.
📅 If you want to schedule a meeting with the technical team for this integration:
👉 https://calendly.com/grispi-teknik/entegrasyon
💬 8. WhatsApp Integration
✅ What does it do?
It allows messages from WhatsApp to be converted into requests in Grispi.
⚠️ Things to Watch Out For:
- The number must be able to receive SMS/calls
- IVR (robot response) should not be activated
- The number must be connected to a physical phone
📌 Installation Steps:
- Contact the Grispi technical team
- Configuration is completed via Connexease
- Verification code is received via SMS or call → transaction is completed
You can access the article How to Integrate WhatsApp in Grispi here.
📅 If you want to schedule a meeting with the technical team for this integration:
👉 https://calendly.com/grispi-teknik/entegrasyon
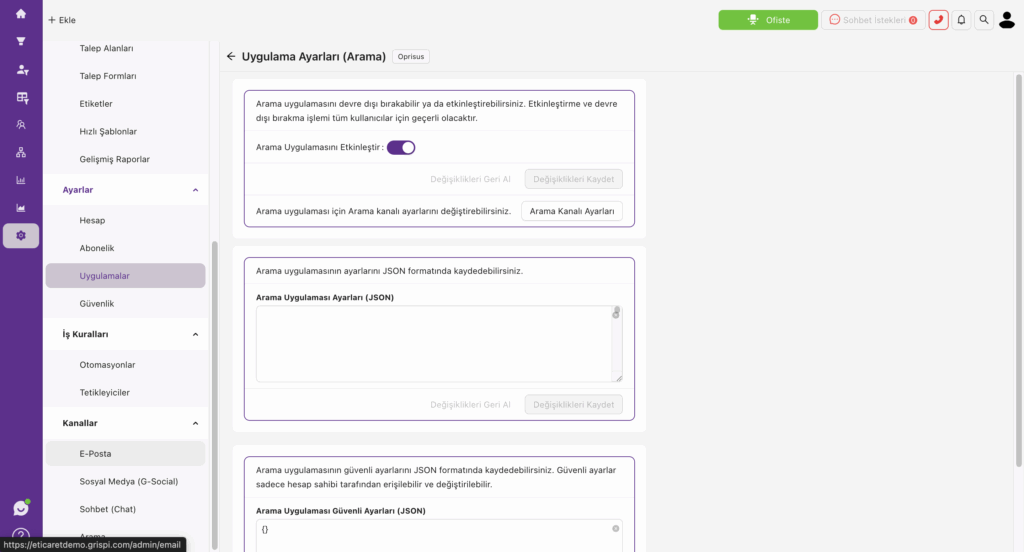
☎️ 9. Call Center Integrations (Alotech, Oprisus etc.)
✅ What does it do?
Allows incoming/outgoing calls to be automatically linked to requests and displayed on the agent screen.
📌 What to do?
- Contact Grispi support team
- Share the following information:
- Number of representatives
- Name, surname, e-mail address and area code/extension number of each representative
📧 If you want to get support for call center integration → [email protected]
Grispi Call Center Integration: AloTech and Oprisus (SolveLine) article is available here.
What is Oprisus (Solveline) Call Integration and How to Activate it? article is available here.
✅ Installation OK!
Now:
- You have added your users
- You have integrated all your communication channels
- You direct your demands with automation
With Grispi, you are ready to manage multi-channel customer requests centrally, efficiently and quickly.