Grispi introduces a new feature to make ticket management more efficient and organized for businesses: Managing Claim Viewing Restrictions. This feature enhances data security by predefining which tickets each Agent user can access, while also enabling clearer delegation of tasks.
What Is the Main Purpose of This Feature?
This newly added feature makes it easier to clearly define roles and responsibilities, especially in organizations. Each agent can now only view tickets related to their job description. This is an important step in terms of both security and work efficiency.
How Does the Feature Work?
Default Claim Display Restriction for New Agent Users
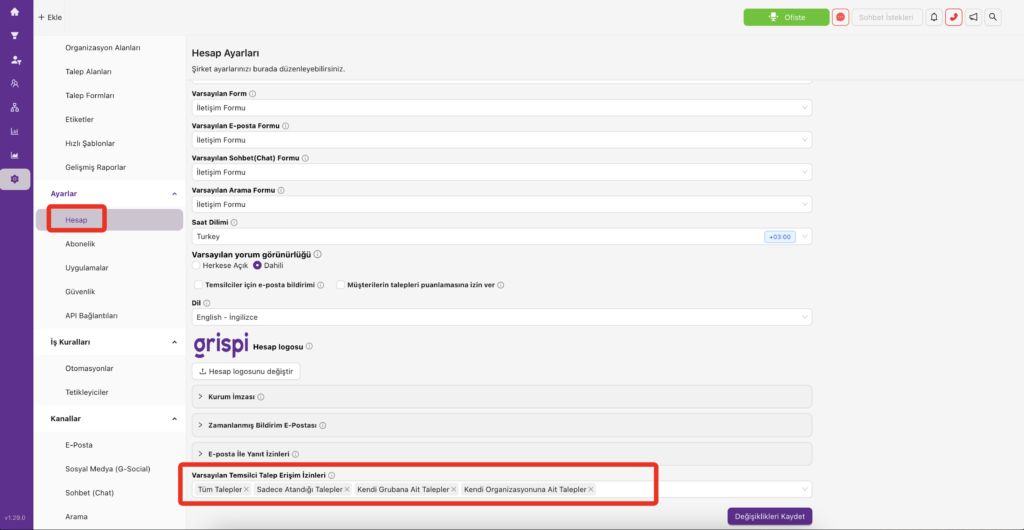
In the account settings, a default claim viewing restriction can be defined for newly created Agent users. This means that when a new agent is added, the types of claims they can view are predetermined. The restriction options that can be assigned to a user are as follows:
- All Tickets: The user can view all claims.
- Self-Assigned Tickets: The user can view only the claims assigned to them.
- Claims Assigned to Their Group: The user can view claims assigned to the group they belong to.
- Tickets Assigned to Their Organization: The user can view all tickets assigned to their organization.
One or more options can be combined to customize each user’s access level according to business needs.
Restriction Management for Existing Agents
By default, Agent users already registered in the system are authorized to see all claims. However, this authorization can be easily modified:
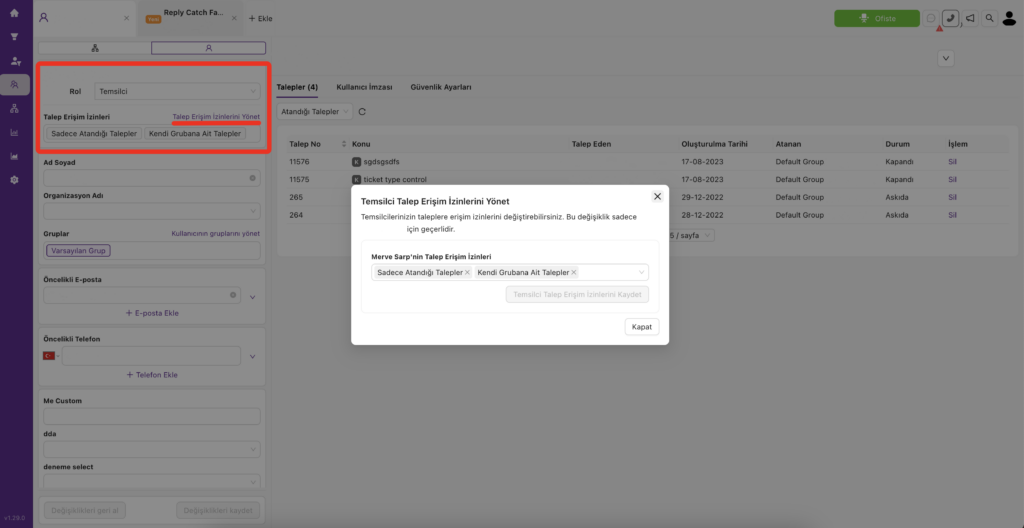
- Management via User Profile:
By navigating to the profile of an existing agent, their ticket access permissions can be edited using the “Manage Ticket Access Permissions” section. From here, access levels can be redefined based on the options listed above. - When Restriction is Active:
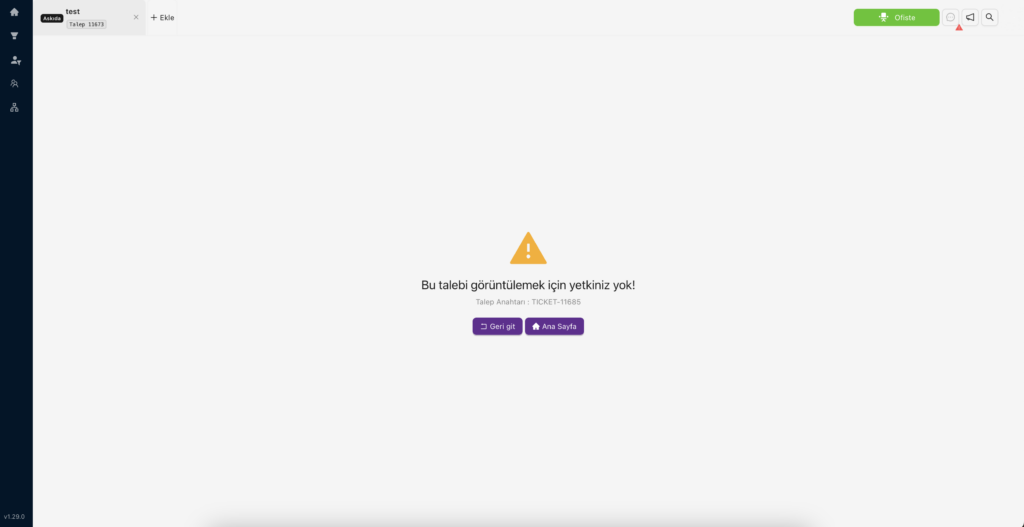
If an agent attempts to access a ticket they are not authorized to view, they will see a warning message:
“You do not have permission to view this ticket.”
Updating Ticket Access Permissions
This feature applies to both newly added and existing users. Each agent’s access permissions can be easily edited from the “Manage Ticket Access Permissions” section on their profile card. This flexibility makes it convenient to update access levels as the organization’s needs evolve.
What Benefits Does This Feature Offer?
1. Data Security and Privacy
Claim viewing restrictions enhance security by ensuring only authorized individuals can access sensitive data. This is especially important for protecting customer information.
2. Clearer Role Definitions
By allowing agents to only see relevant tickets, this feature reduces workflow complexity and boosts productivity.
3. Flexibility and Customization
The ability to tailor access levels for both new and existing users ensures the system can adapt seamlessly to various business processes.
How to Set Claim Display Restrictions?
- While Adding a New User:
- Go to Account Settings.
- Select Claim Display Restrictions during the user creation process.
- Check the relevant options and create the user.
- For Existing Users:
- Go to the profile page of the user.
- Click on “Manage Ticket Access Permissions.”
- Set the desired access level and save.