Sending Email
To send emails using the Amazon SES provider, you need an AWS account. If you don’t have one, visit the AWS website and click on the “Create an AWS Account” button in the top-right corner of the screen.
Please note that even if you only plan to use the free tier, you will still need to provide your credit card details.
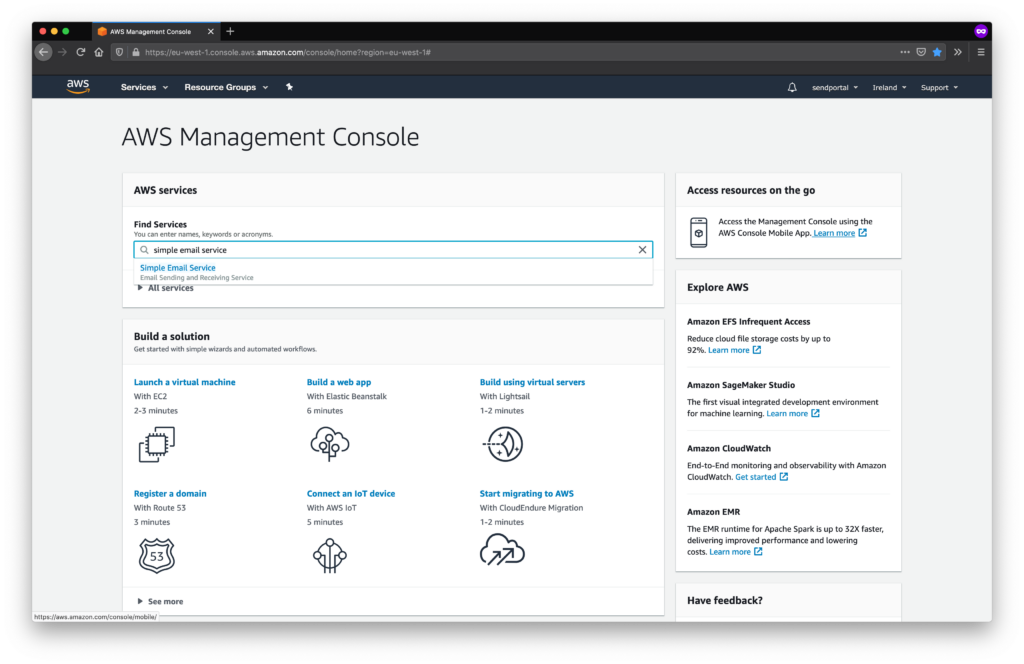
Once your account is created, search for “Simple Email Service” in the “Find Services” bar in the AWS Management Console and select it to access the SES dashboard.
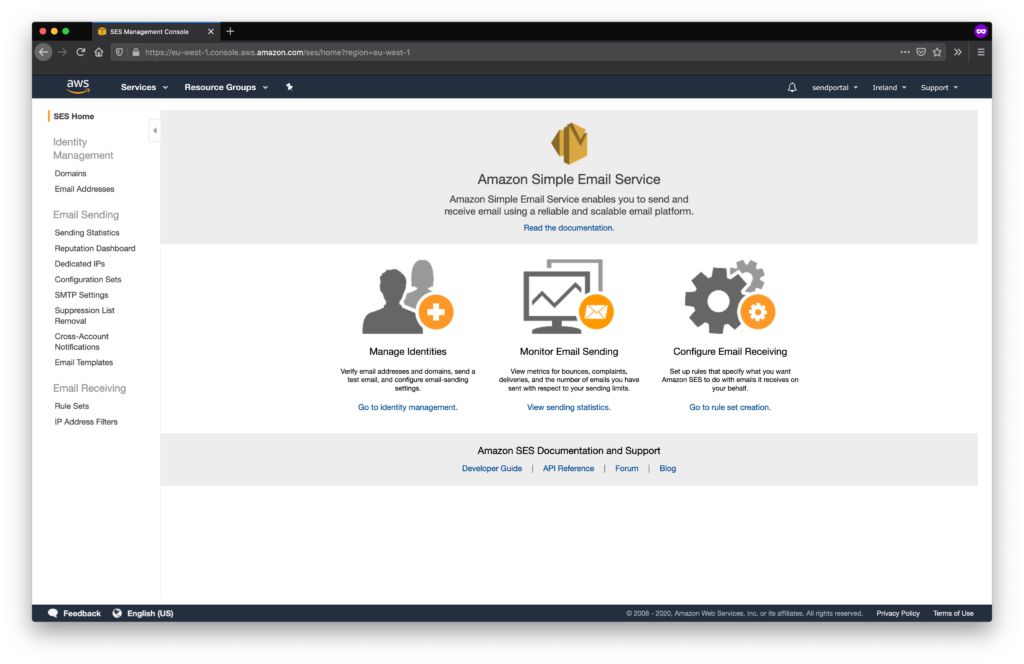
Click the “Go to Identity Management” button.
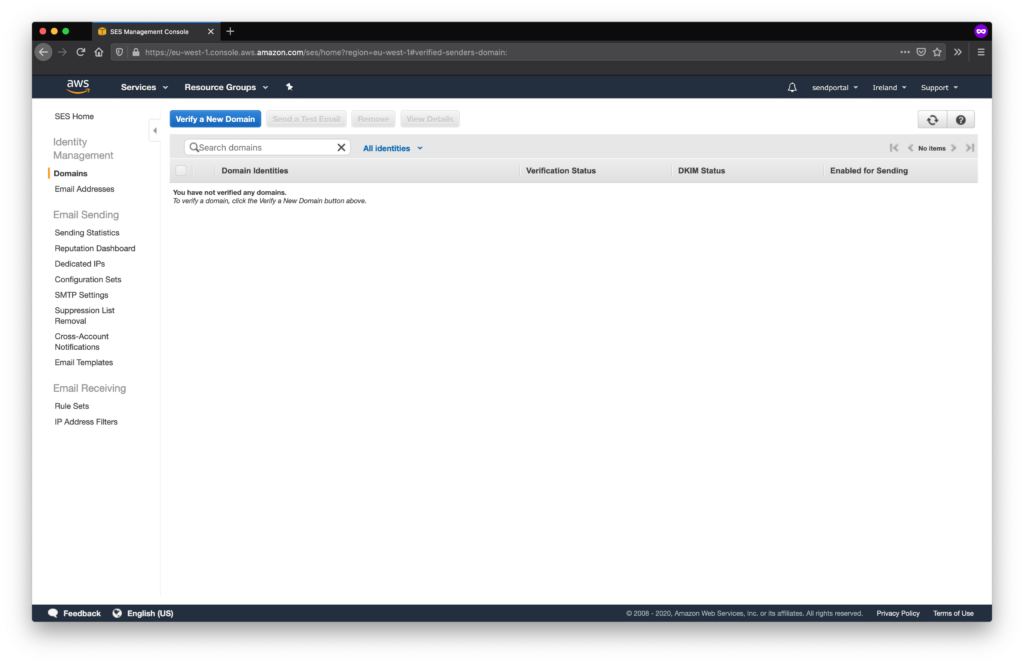
You will need to verify the domain from which you want to send emails. Click “Verify a New Domain” to begin.
You can skip DKIM configuration for now. However, enabling DKIM is highly recommended for production use, as it helps prevent your emails from being marked as spam.
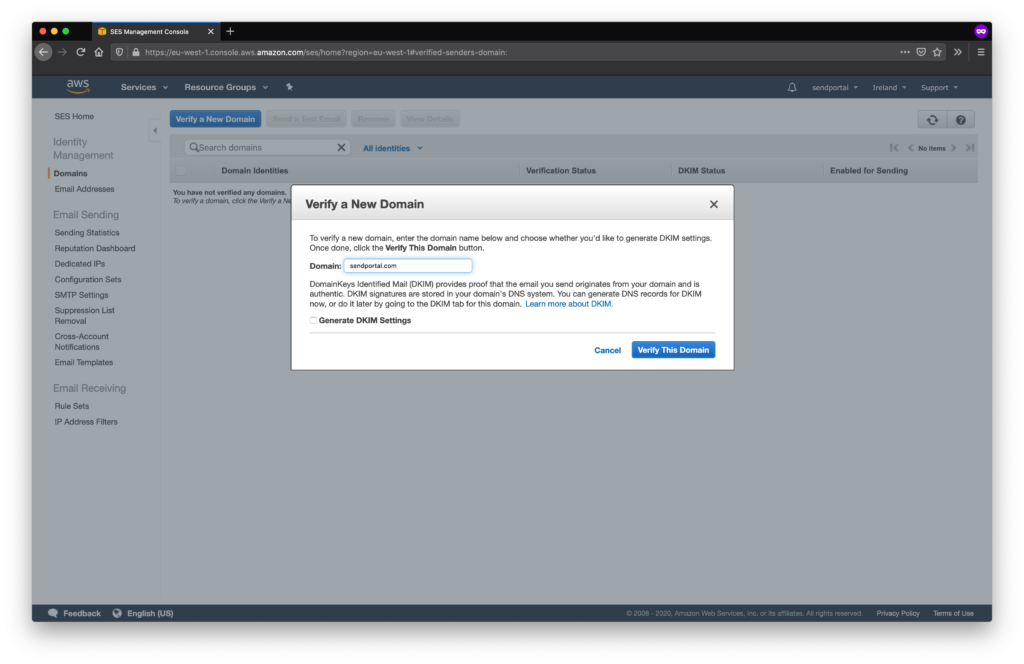
After clicking “Verify This Domain”, you will be presented with a domain verification record.
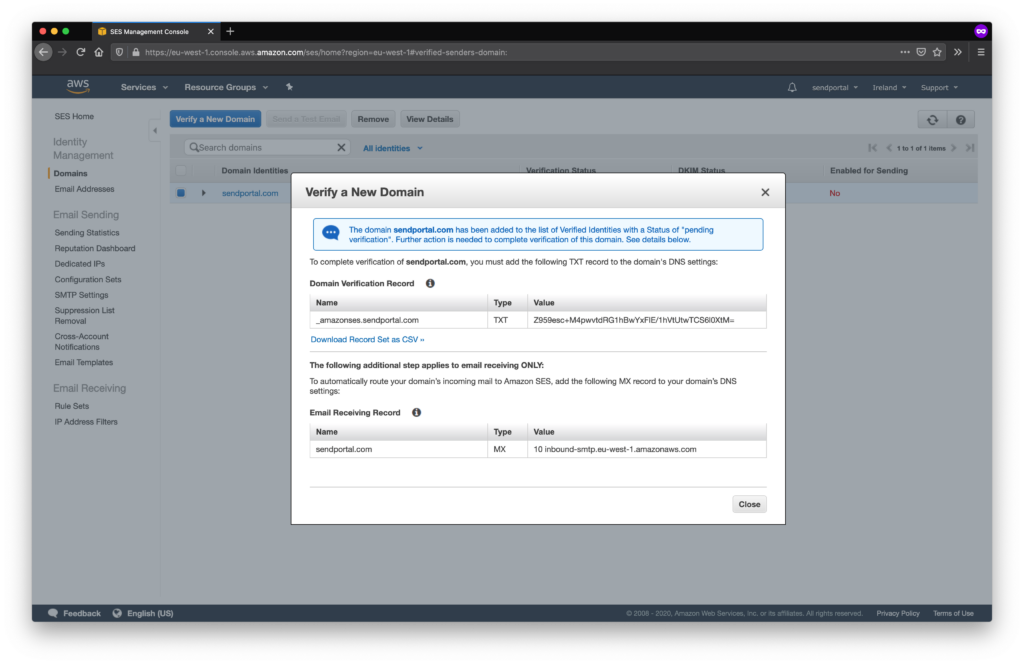
Now go to the platform where you manage DNS for the domain (usually your domain registrar). The process varies depending on the provider and is outside the scope of this guide. However, you must create a TXT record for your domain and copy the exact values from the Name and Value fields provided by AWS.
After this, click Close. Initially, the Verification Status will show as “Pending Verification,” and Enabled for Sending will appear as “No.”
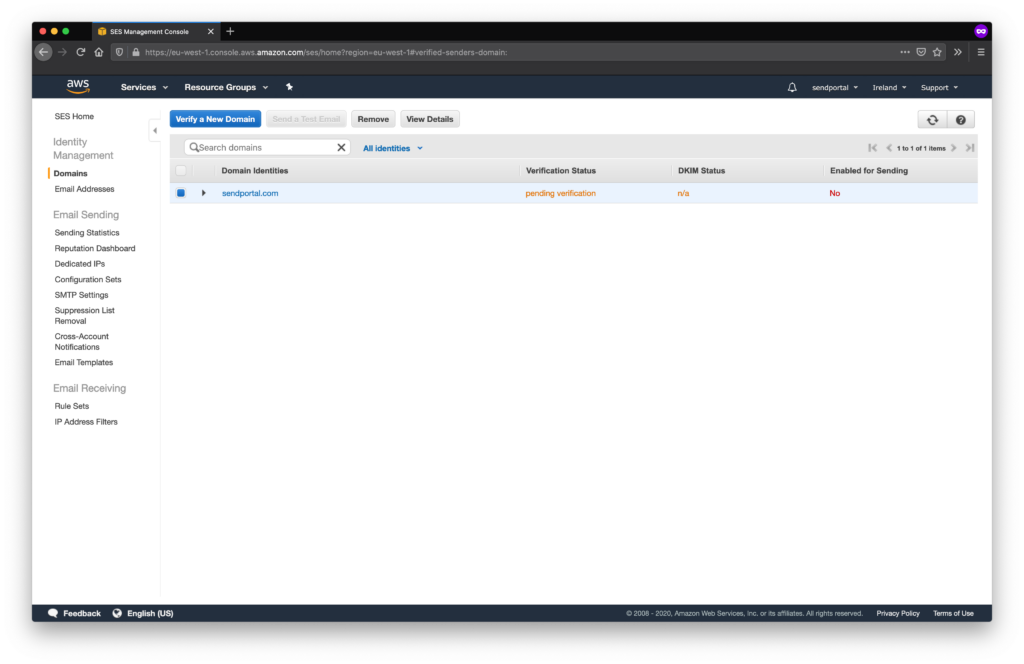
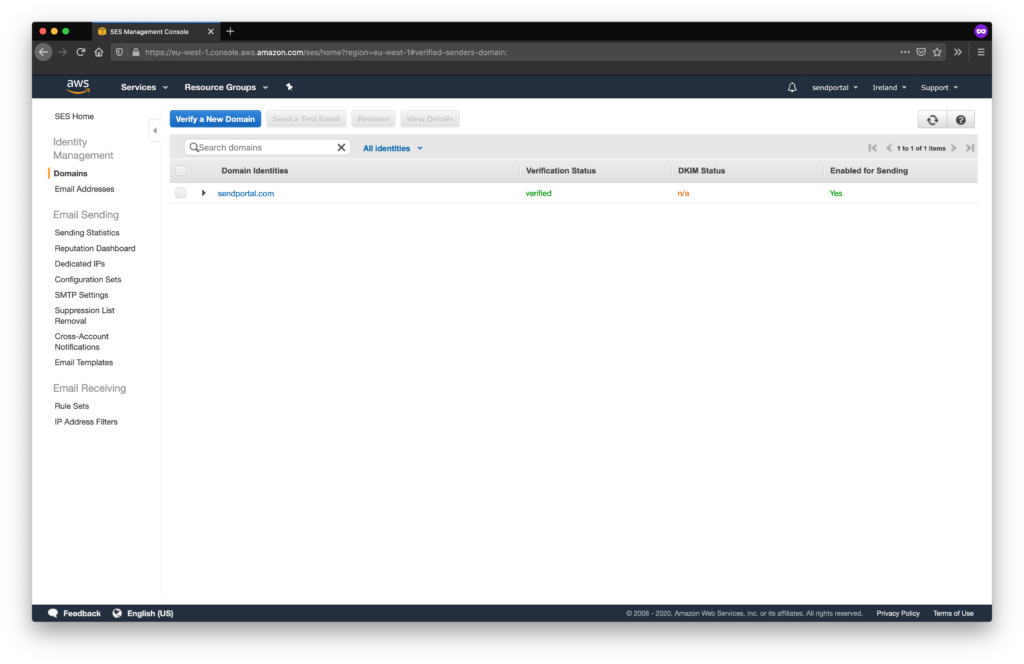
As long as you configure the DNS record correctly, the Verification Status will change to “Verified,” and Enabled for Sending will change to “Yes.” You’ll also receive an email notification confirming that your domain has been successfully verified.
This process may take some time. If verification fails, double-check that you didn’t accidentally include any spaces when copying the DNS record values.
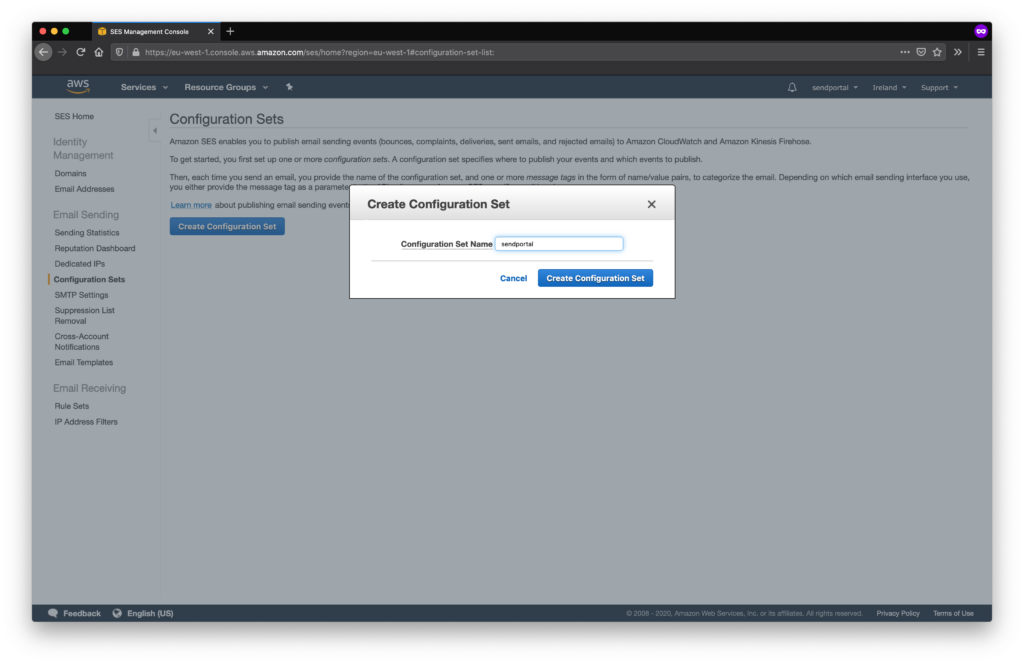
Creating a Configuration Set
Next, you need to create a Configuration Set. To do this, select Configuration Sets from the sidebar in the SES panel.
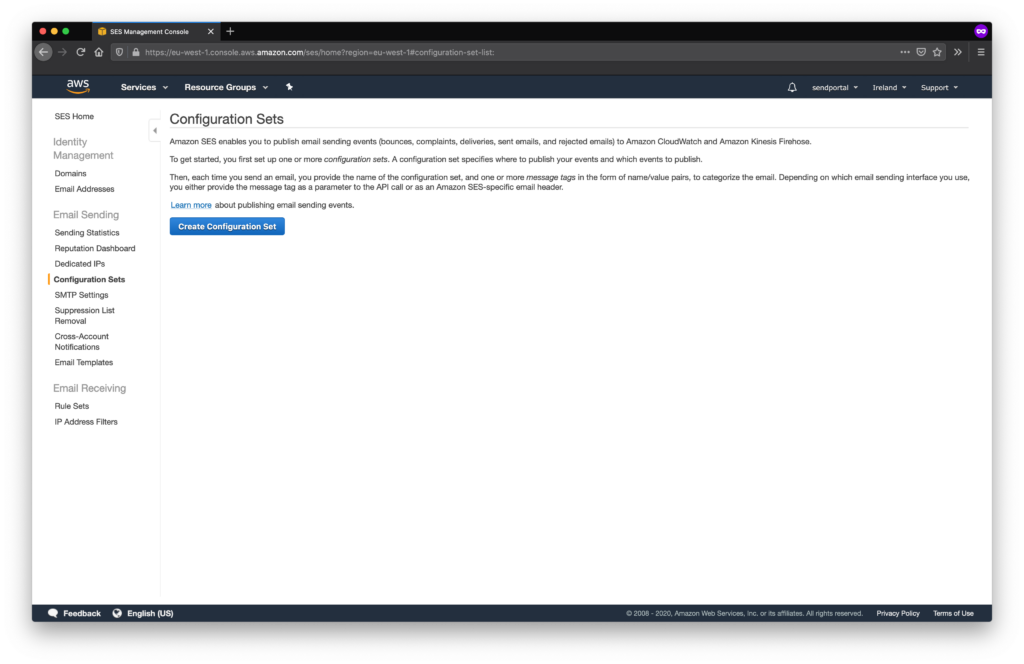
If you do not need email tracking (delivery, open rates, etc.), a single configuration set will suffice.
Creating an Access Key Pair
Go to the IAM (Identity and Access Management) section of AWS.
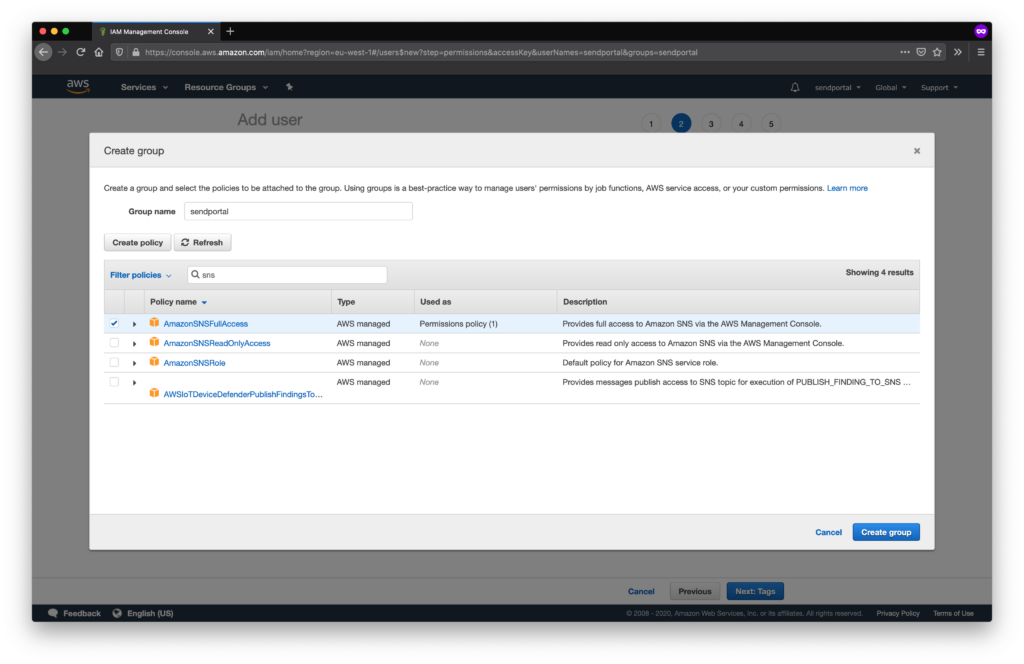
It’s best practice to create a new IAM user. Click Users, then Add User. Although you can create access keys using the root user, this is strongly discouraged due to security risks—root access provides full control over your AWS account.
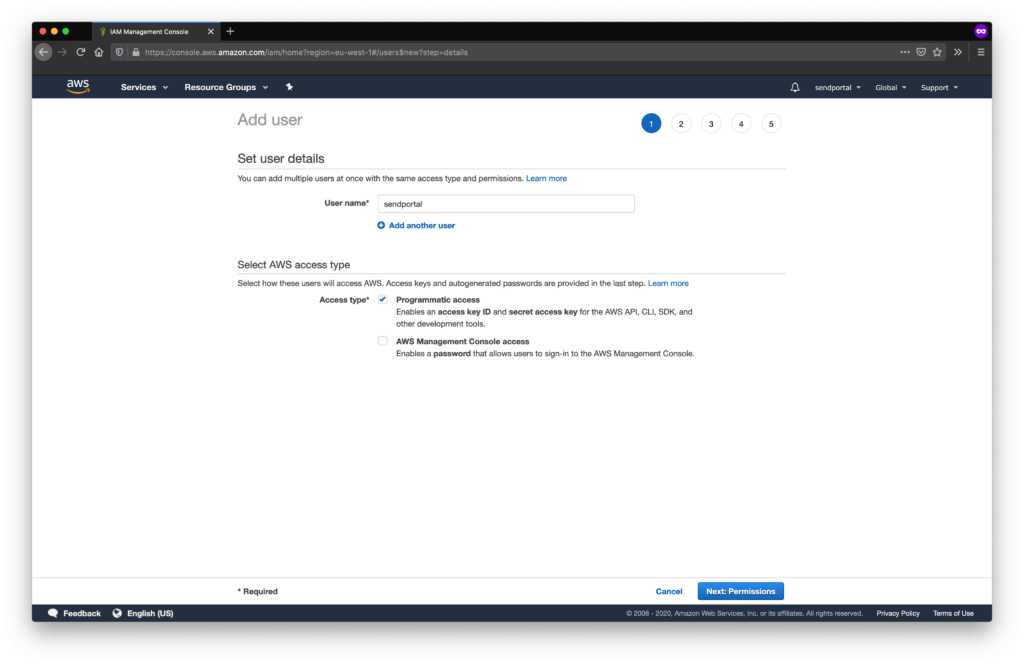
Select “Programmatic Access Only” since this user doesn’t need access to the AWS Management Console.
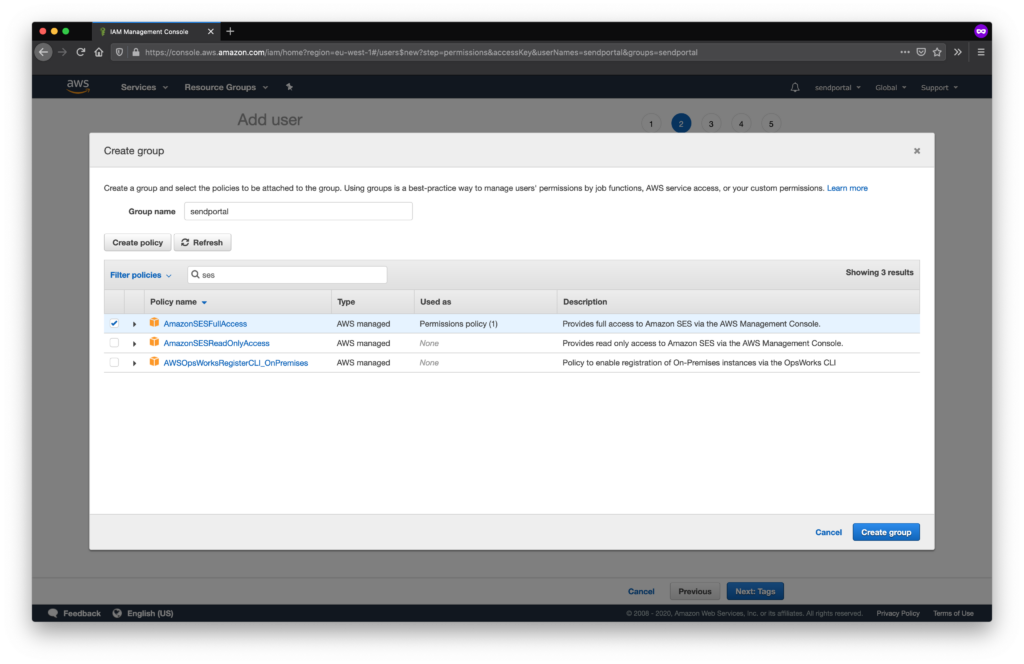
If you plan to enable email tracking, be sure to attach the AmazonSNSFullAccess policy to this user.
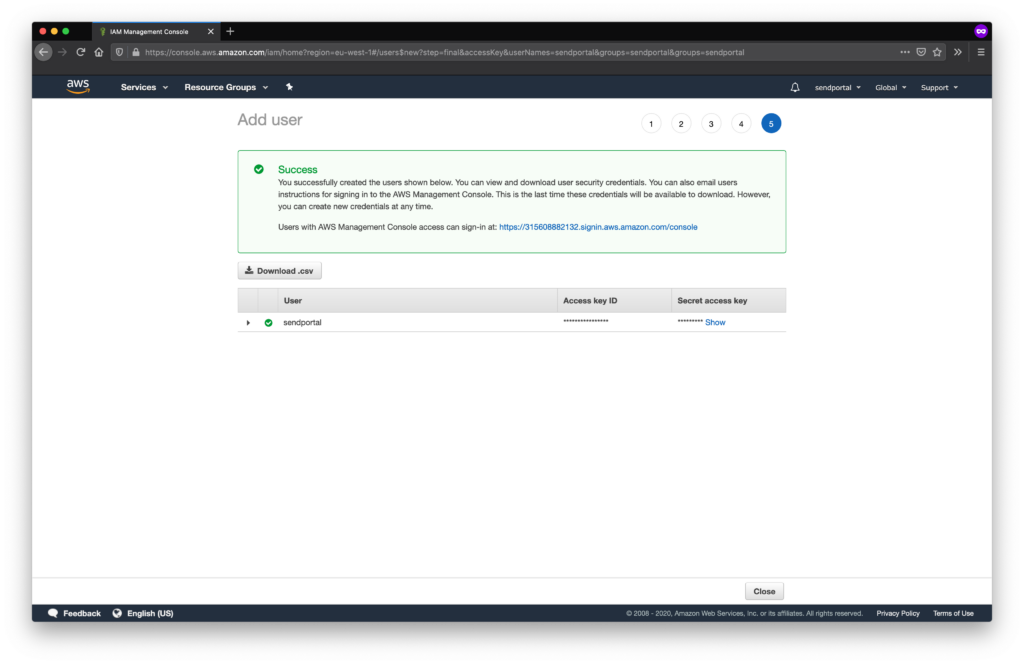
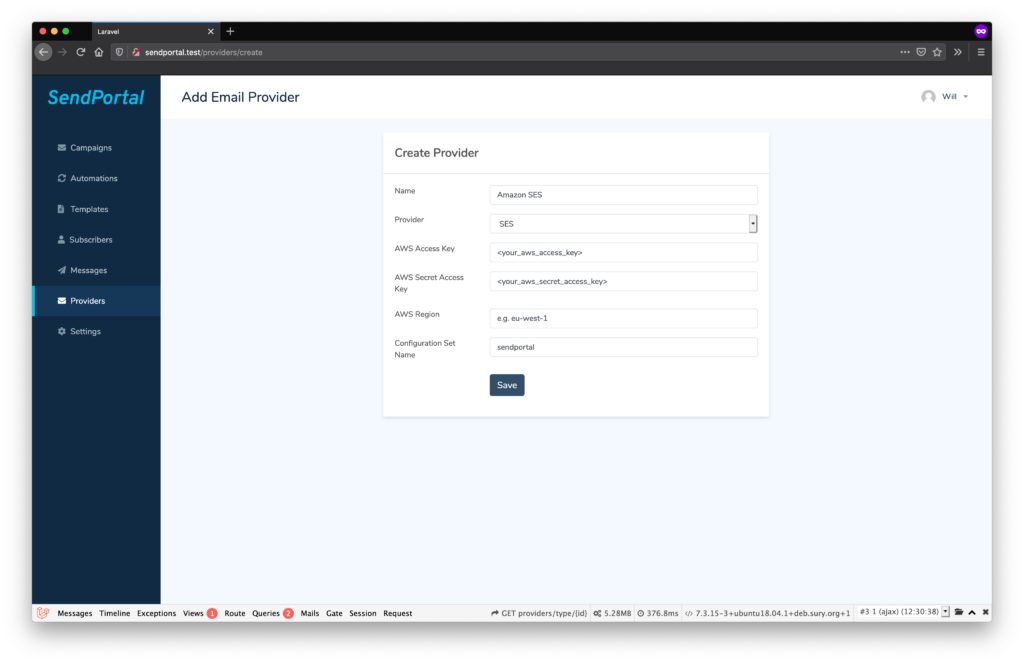
After creating the user, copy and paste the Access Key ID and Secret Access Key into the provider configuration within the Grispi Bulk Email Portal.
You’re now ready to configure the provider in Grispi Bulk Mail.
ongratulations! You can now send emails using Amazon SES.
For more information, refer to the official Amazon SES documentation.
Enabling Email Tracking (Optional)
To enable tracking for emails sent via SES, a few additional steps are required.
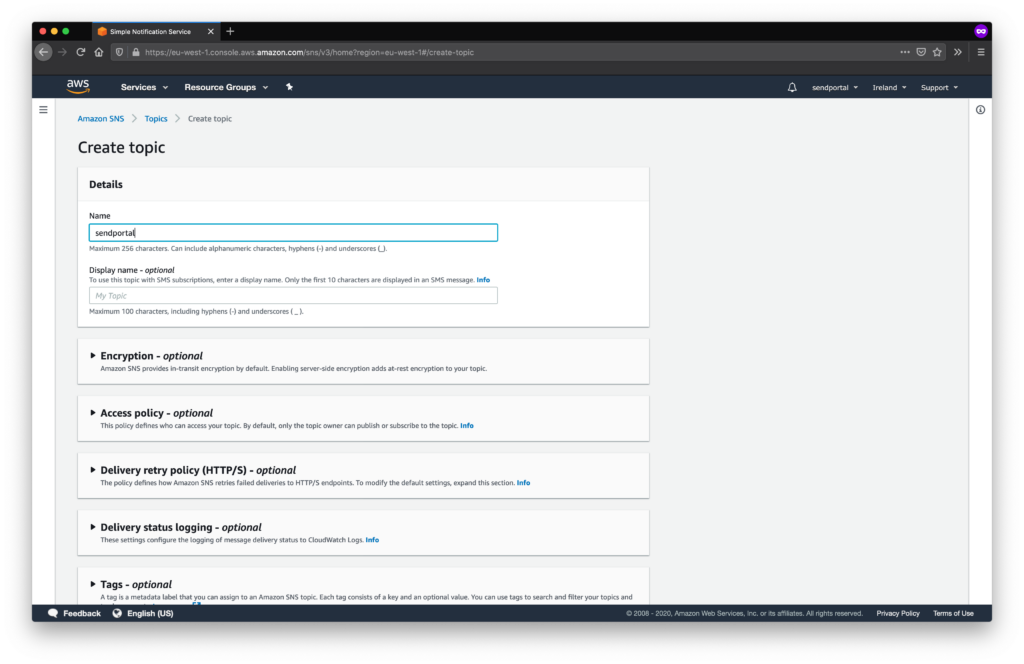
You need to configure Amazon SNS (Simple Notification Service) to send webhook notifications to the Grispi Bulk Email Portal. Go to the SNS page in the AWS Console.
- Create a topic by selecting Topics and clicking Create Topic. Aside from the name, other fields are optional.
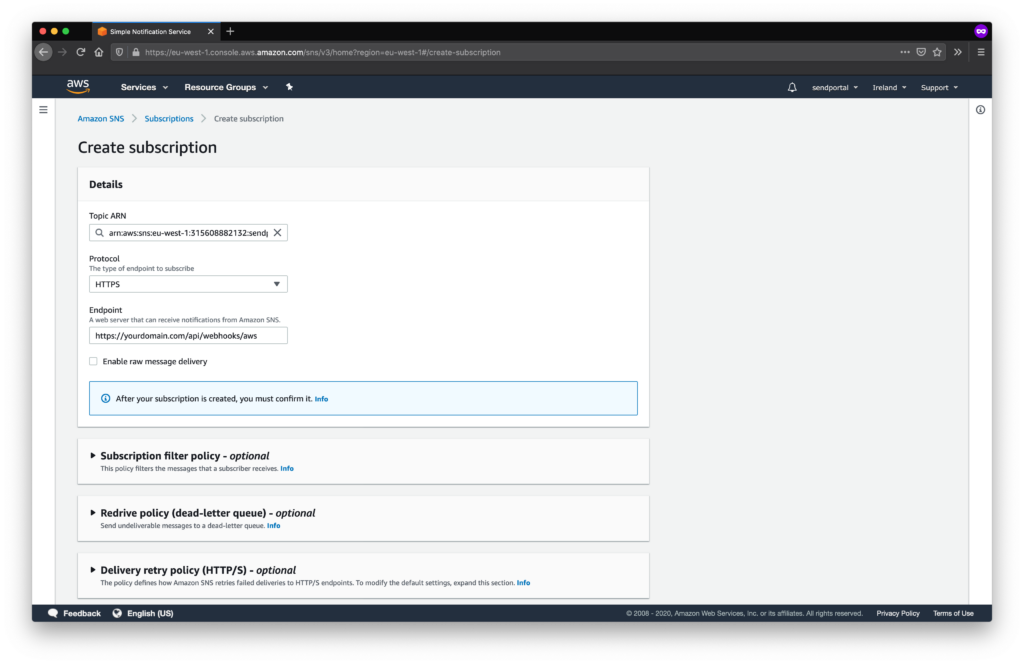
- Next, create a Subscription linked to the topic:.
-Select HTTPS as the protocol.
-For the Endpoint URL, use the format:https://your-domain.com/api/v1/webhooks/aws
–Example: If Grispi is installed athttps://campaigns.marketing.com, use:https://campaigns.marketing.com/api/v1/webhooks/aws
Make sure to disable Raw Message Delivery, as enabling it may cause webhook processing to fail.
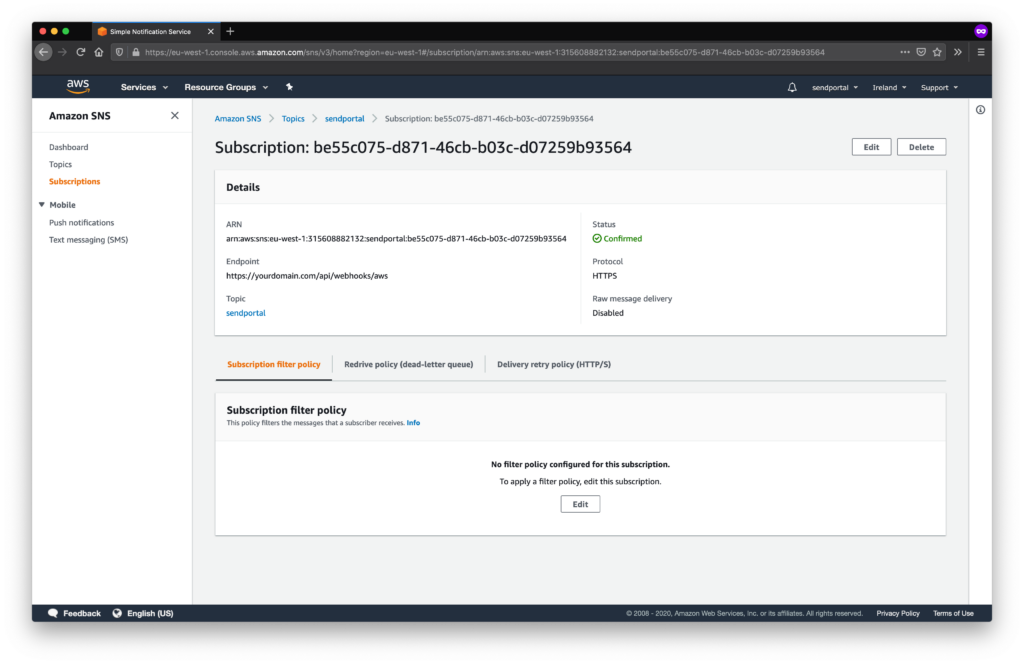
The subscription must be confirmed before use. If the URL is publicly accessible, Grispi will automatically confirm the subscription.
You should see the subscription status change to Confirmed.
Linking SES to SNS
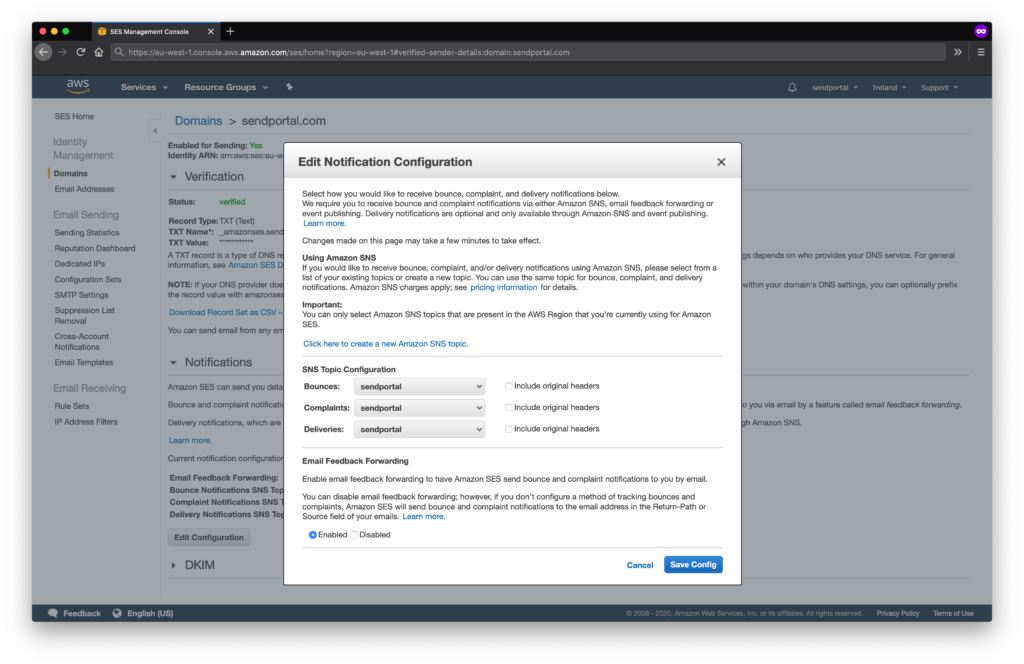
Return to the SES dashboard.
In the Domains section, select your verified domain and navigate to the Notifications tab.

Click Edit Configuration and choose the SNS topic you created for each notification type (Bounce, Complaint, Delivery, etc.).
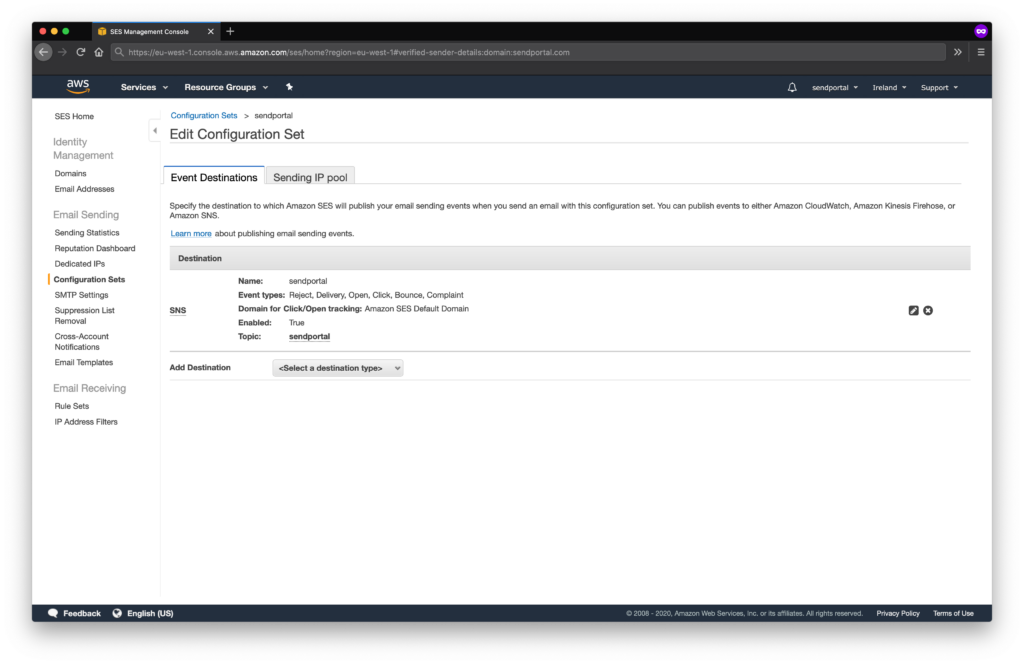
Finally, associate this configuration with your configuration set:
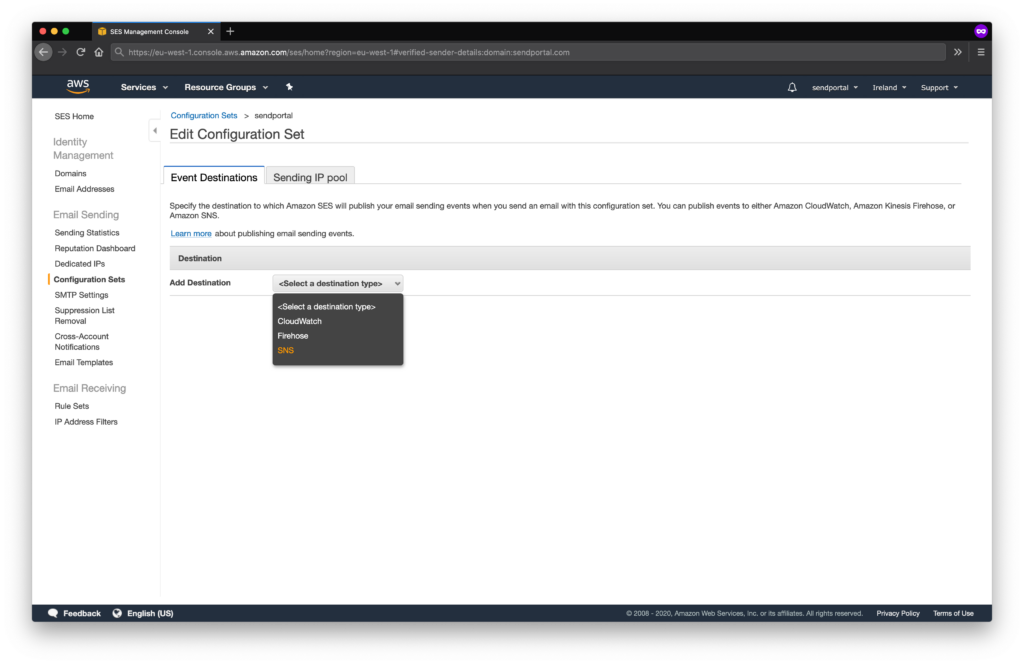
- Select the configuration set.
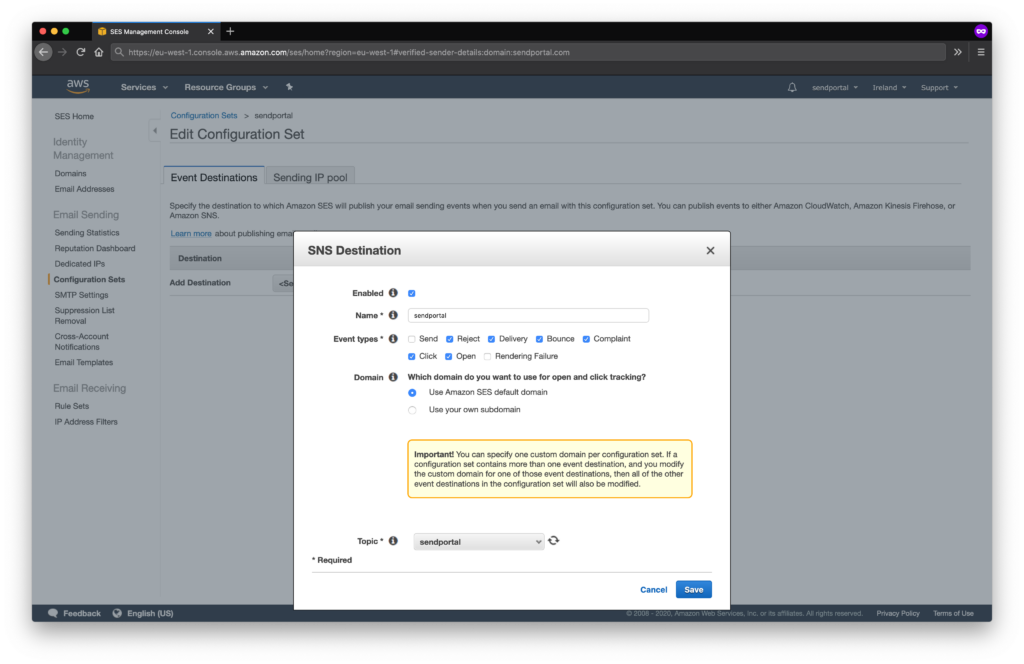
- Under Add Destination, choose SNS from the dropdown.
- Select the notification types (except Send and Rendering Failure) and assign the SNS topic.
That’s it! 🎉 You are now set up to send and track emails using Amazon SES and Grispi.
Throttling
Amazon SES imposes rate limits on email sending. By default, you can send 1 email per second, though you may request a higher limit.
To avoid hitting these limits, especially with medium or large mailing lists, it’s recommended to implement a caching mechanism. For small lists, file-based caching may suffice. For larger lists, using Redis is advisable.